Wednesday, December 22, 2010

More floors (again)...

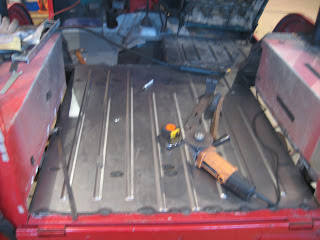
So at this point, I managed to score a floor section off of ebay that is original, but damaged. These suckers cost over 500.00 to buy (rip off) if you buy them complete...I opted to buy the damaged one that was just missing the bottom braces and had a cut in the metal. Big deal. Easy fix, cost me 90.00 instead of 500.00. I simply welded two pieces of U-channel underneith for support, and ended up trimming the back anyways. Here you can see the back cargo section mounted, with two carrier bolts securing it to the frame. I re-used some rubber pads off of Betty, my 1950 Buick underneith the bolts.


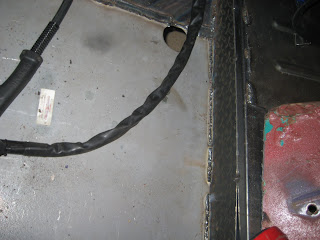
Here is the front driver floor, where it meets the riser. You can also see the cargo area stitched in. This will all be covered in seam sealer and then shot with U-pol bed liner.


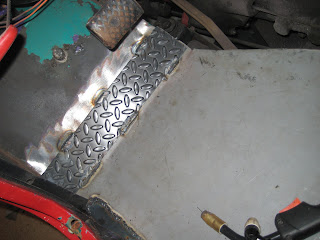
Here's the front of the driver's side, with the matching diamond plate kick piece that helps hold the two seams together.


The center bolt-on sections were sandblasted, and the one repaired. At this point, the bottom side is painted in Eastwood's rust encapsulator, which gives you a bullet-proof rust inhibitor. Next they'll be bolted in place and the front should be ready to seam-seal.

Sunday, December 12, 2010

More floors.....

So I took a trip back down to the sandblaster to clean up the center sections of the floors. These sections bolt in, which make it easy to remove for transmission bolt removal...I guess whatever else you wanna do down there. Unfortunately, the sandblasting not only took off 40 layers of paint, but exposed the weak metal under the gas pedal / area where the right foot would be. I opted to cut that section out and replace with fresh metal, which was a pain considering how thin the metal was here.


Here we're marked and ready to cut.


Here the spot welding is done on the center section. It will need to be seam sealed to fill in the little holes as this piece is impossible to weld 100%. I'll end up riveting this piece down so if it does need to be removed, you can just drill the rivets out. I might bolt it down...I haven't 100% decided yet. Lots of welding to do over on this side, but the overall pieces are mocked up, tacked up, and ready to go.

Sunday, December 5, 2010

Fan-tetanus!

So the next order of business was the get the rest of the rusty crap cut out of the jeep so I could start putting the floors back together. The biggest pain of all of this is that the step riser that transitions between the cargo area and the front floors was rotted out everywhere. The only thing salvageable on the entire floors is the tool box, located below the passenger seat. This had been replaced at some point in the jeeps life...luckily....replacements are 300.00. Luckily when someone replaced it, they undercoated it as well. The passenger floors had already been replaced by me over the summer, so armed with my newly acquired plasma cutter, the rear cargo area was cut out (both the upper galvanized riveted crap the previous owner put down) and the rusty underneath, the and the riser. With rust scale flying, falled, splattering, and smoke flying everywhere from burning seam sealer and old bondo....we had fun. Pictures look like crap from so much smoke and dust in the area. Here's everything stripped down except for the riser, which you can see rotted out running along side the tool box on the passenger side.


In the two upper pictures, you can see the new u-channel riser spot-welded into place. Everything works around this riser, so it had to start there. If you look right to the left of the crow-bar...you can see where the plasma cutter cut right through 2 layers of sheet metal and right through the frame cross member...lol. (Click on any pic to bring it up in more detail)


Here's a quick mock-up of the floors on the driver's side. The hole in the metal is where the fuel feed line runs under the car (keep in mind the gas tank is directly under the seat in CJ5's older than the early 70's.) The transmission shifter plate will be sandblasted and then sprayed in the same U-pol truck bedliner coating that the rest of the interior will be painted in.